A Necklace for Naomi

 When it comes to sewing supplies, I admit it, I am a hoarder. And I am not the only one in my family with this condition, luckily for me, my beloved grandmother is also prone to this.
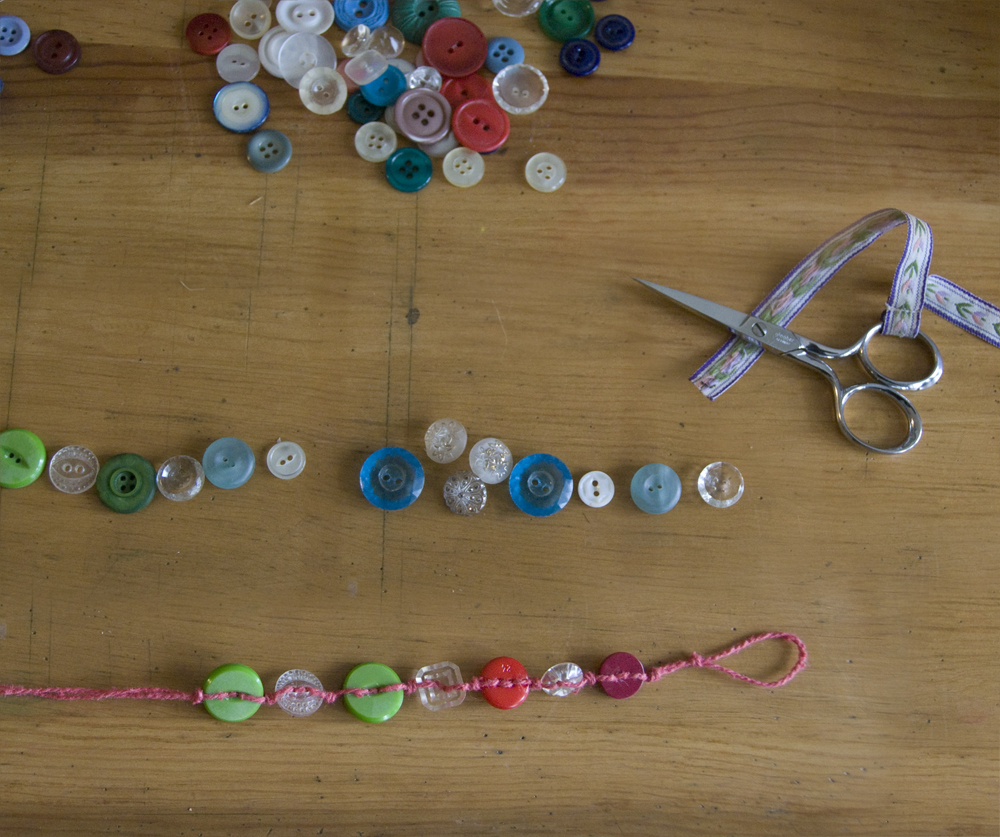
This is how I have a fantastic stash of vintage buttons gathered from my grandmother, great-grandmothers, and some great-aunts. (I got the majority of these buttons almost 20 years ago... so I hold onto stuff for a long while if it is sentimental and colorful).
When it comes to sewing supplies, I admit it, I am a hoarder. And I am not the only one in my family with this condition, luckily for me, my beloved grandmother is also prone to this.
This is how I have a fantastic stash of vintage buttons gathered from my grandmother, great-grandmothers, and some great-aunts. (I got the majority of these buttons almost 20 years ago... so I hold onto stuff for a long while if it is sentimental and colorful).

The stash of buttons is full of colorful and patterned buttons, some are made of shell, some glass, and some plastic, and all are interesting. A lot of the buttons are onesies and twosies, and I had been trying to find the best way to use them, when I got the idea to string them together and turn them into necklaces.
And this is what I did… and so can you…
Materials Required:
- An assortment of buttons (the ones with two holes are preferred)
- Natural fiber cord or yarn, thin enough to fit through the holes of the buttons
- Two needles, embroidery needles are preferred because of their blunt points but any needle will work as long as they will fit through the holes of the buttons
- Regular sewing thread, any color
Steps:
- Layout your buttons
- Cut a length of cord/yarn to be 2-1/2 to 3 times the desired length of the necklace, then fold in half
- Make a loop as big as the button used for the toggle latch. Make a knot.
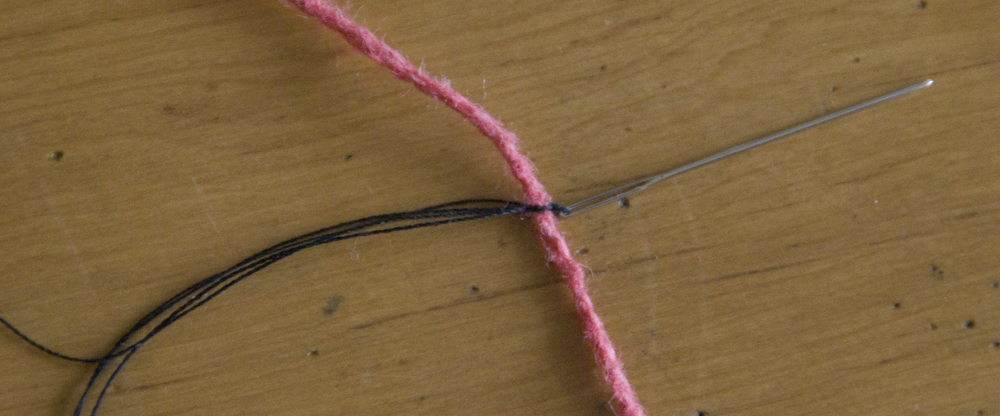
- If the eyes of your needles are not big enough to thread the cord/yarn, double thread the needles with regular sewing thread, create a square knot then bring the cord/yarn next to the eye of the needle and create another square knot.
- Begin threading the buttons using each needle. Make a knot on each side of the bottons, this will help them lay flat.
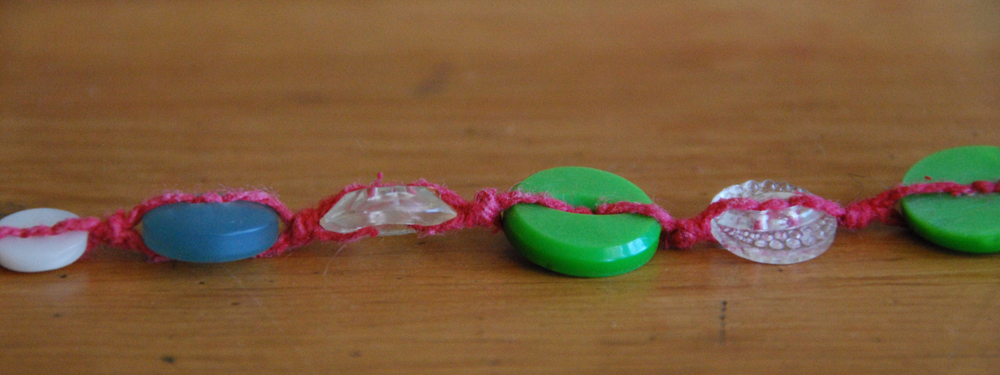
- Keep adding buttons until the necklace is the length you want.
- Knot again and then thread through the last button so it does not lie flat, but will act as the toggle for the loop closure.

- Thread back and knot again, and then cut the extra length of cord/yarn.
You now have a necklace of vintage buttons.
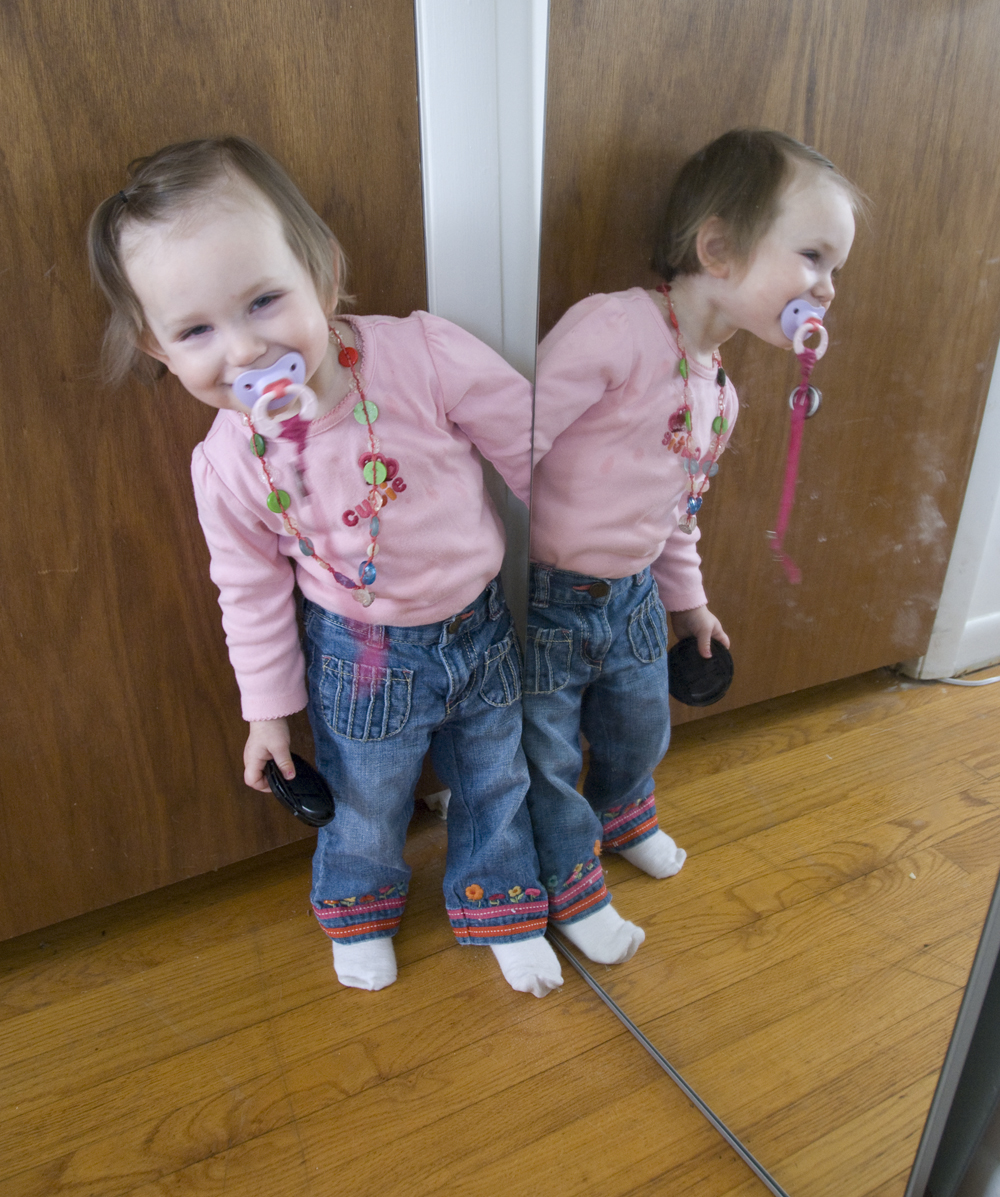
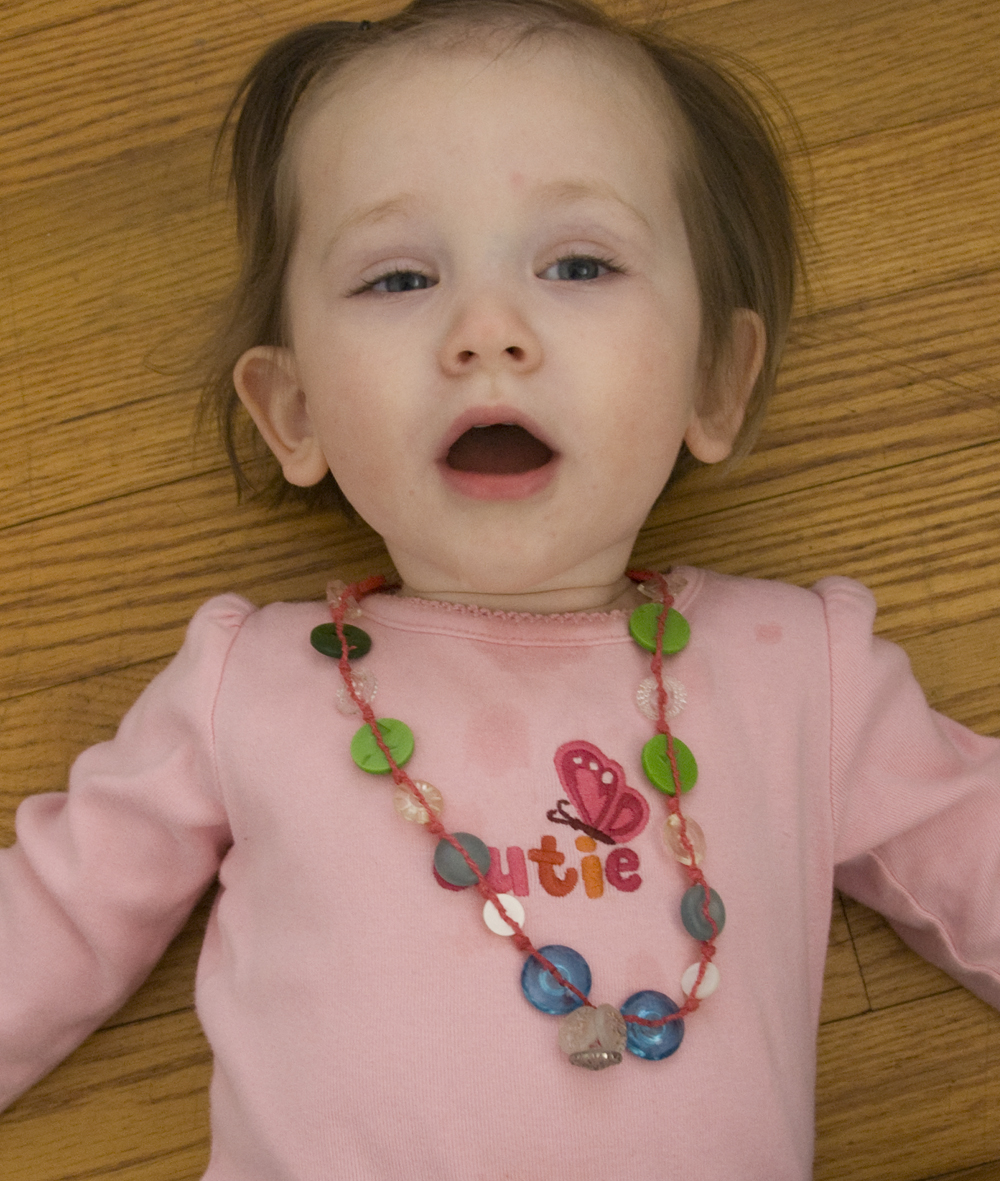
Naomi’s necklace was made with a variety of colorful and clear glass buttons, and in place of a pendant, I grouped three special glass buttons.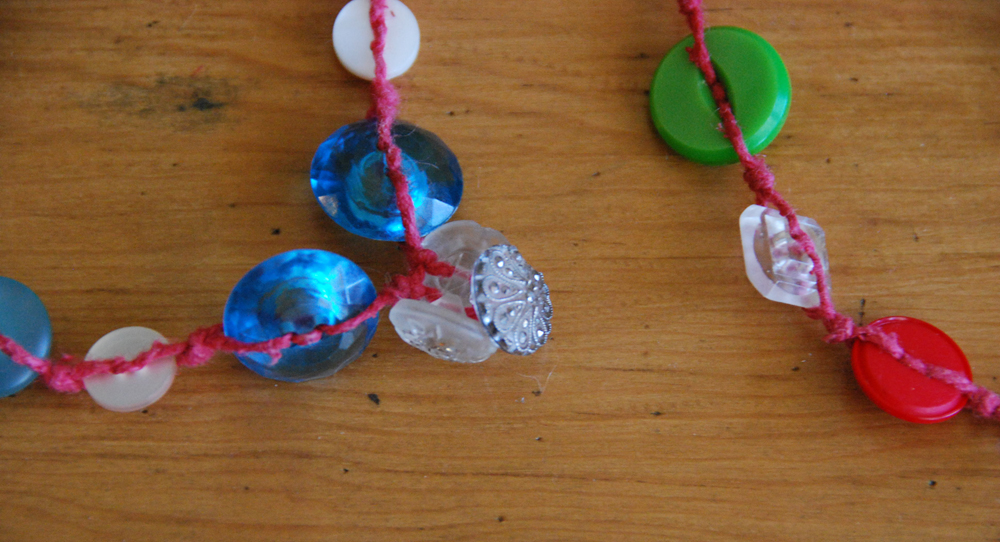
She does enjoy her bling!