Work in Progress - Created with Love: Phase 1

This year it is my goal to work on a few large and more complex compositions and I thought you may enjoy reading about my process. So today I want to share with you a still-life I began in early January 2015, this post discusses the first phase – focusing on painting the amaryllis flower from life.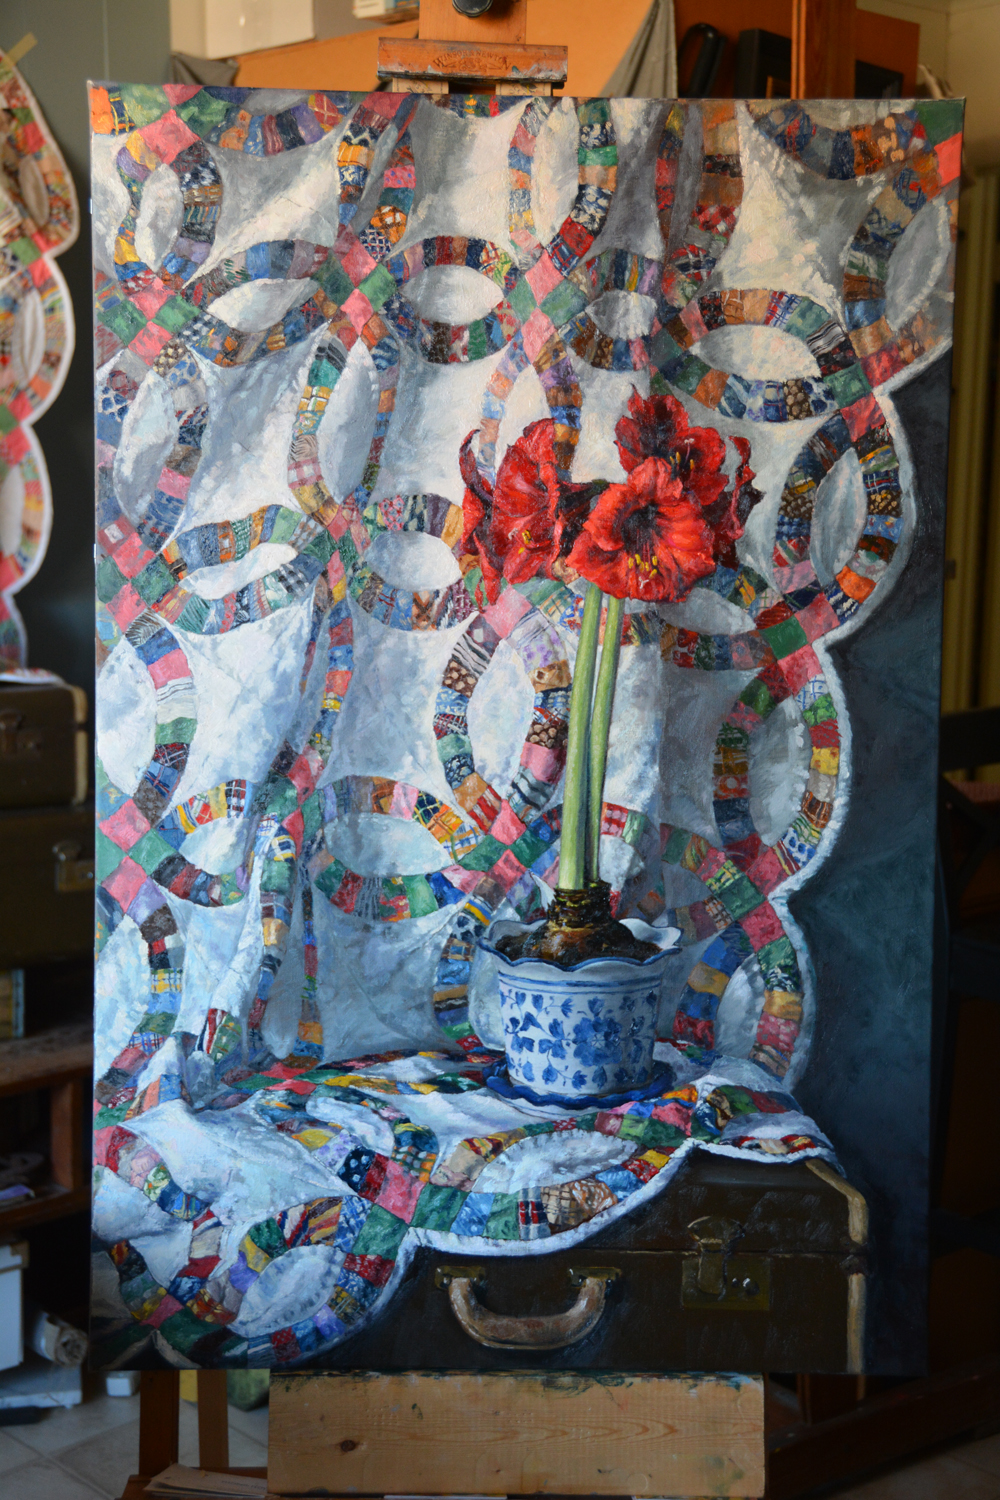
{Created with Love - 36 x 24 inches - almost finished}
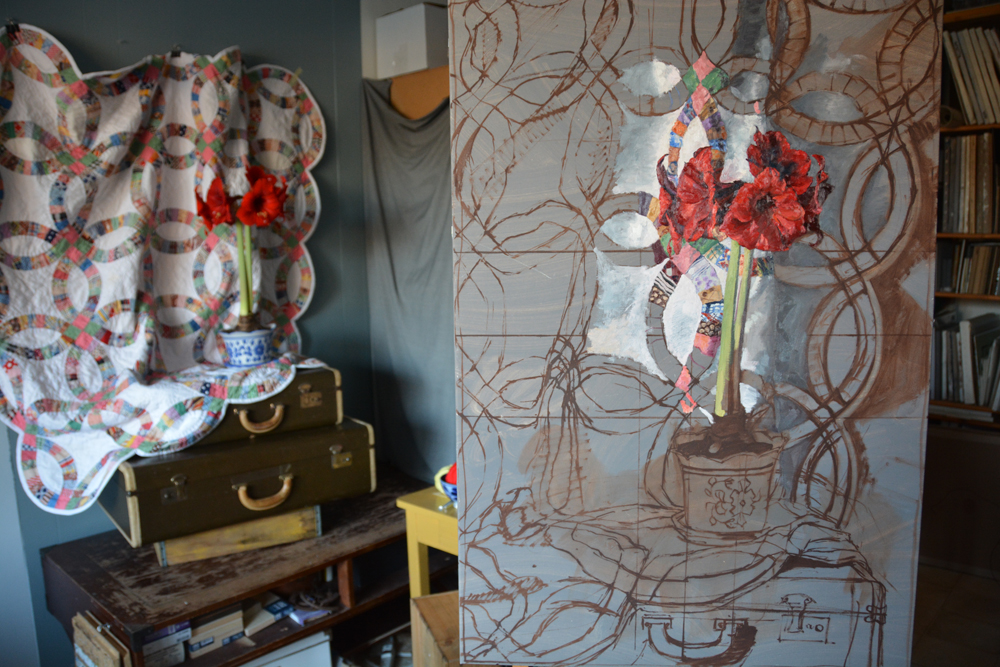
This past December when I was finishing up my double wedding-ring quilt, I began thinking about how fun it would be to paint this quilt in a still-life painting. Then I began pondering what to pair it with… knowing that it would have to be something strong to counteract the bright colors and complexity of the quilt. As I was thinking about possible compositions, one of my large “red dragon” amaryllis bulbs came into bloom, and all was settled. I knew I could begin the painting I was pondering right away.
As an artist, I prefer to paint from life and in natural light. This being said, in the winter months I must rely on winter blooming flowers, which typically involves forcing a variety of bulbs inside. My favorite winter blooming bulb is the amaryllis, a tropical bulb that prospers in our warm interiors.
When painting flowers, painting from life is my preference because I feel my work captures the gesture and essence of the flowers I am working on. I try to stay away from relying too much on photo references, I think it is because photographs are one more filter away from my own personal relationship I have with the flowers. Being an avid gardener and that I typically am nurturing and growing the specific flowers I am painting, it is like I have a deeply felt relationship with them, and I want the flowers to be there while I am painting and trying to convey what I am feeling in paint.
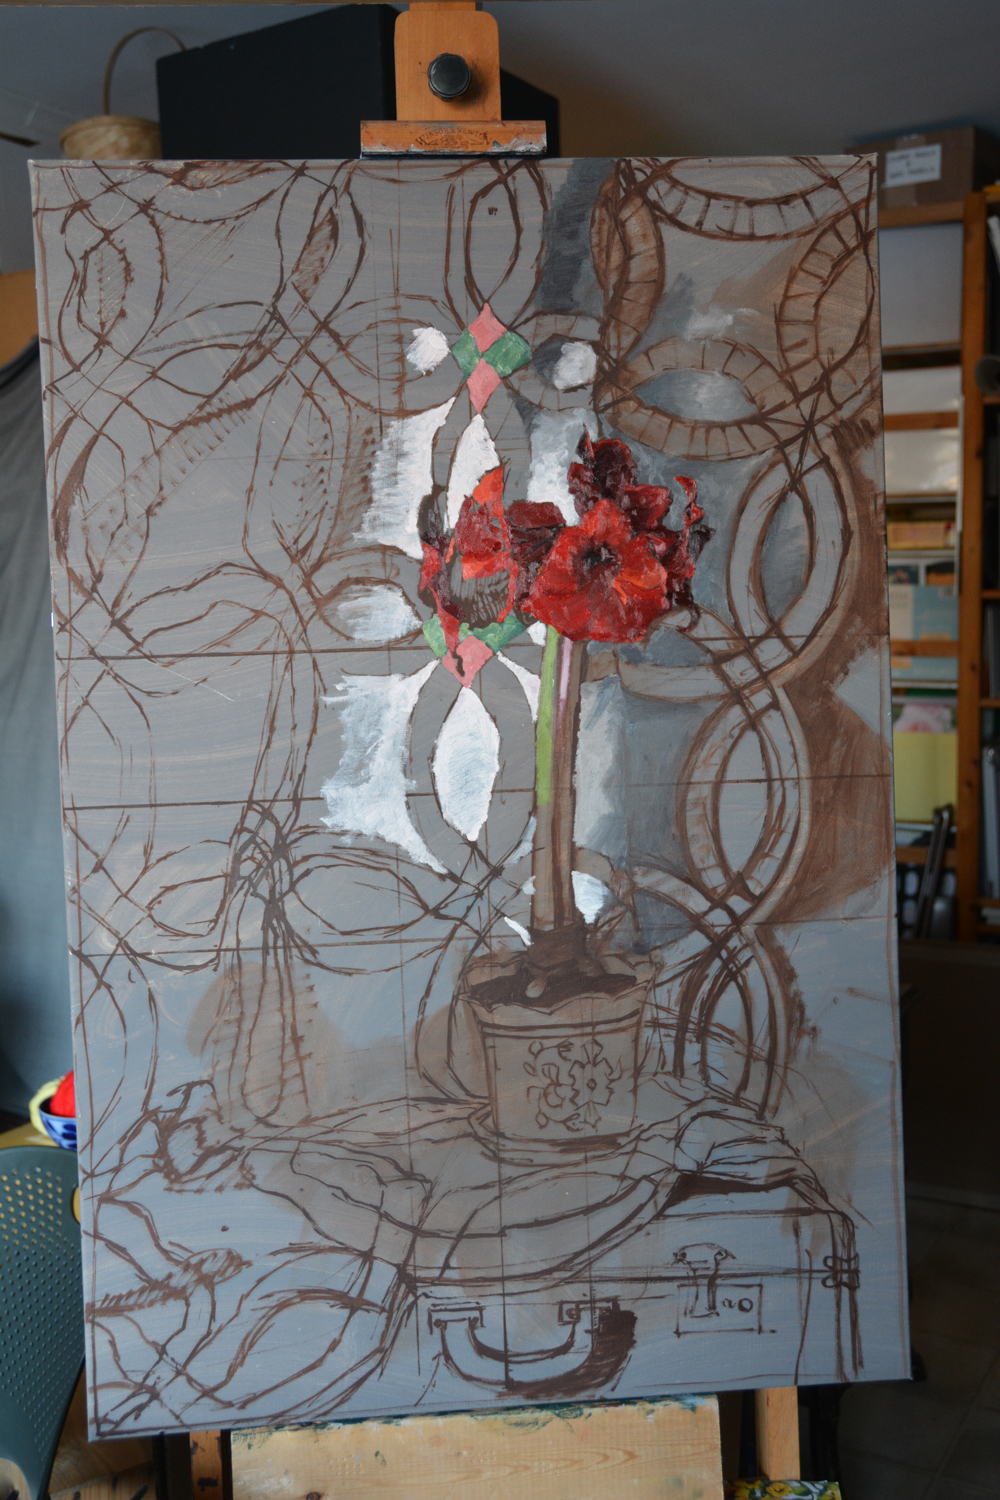
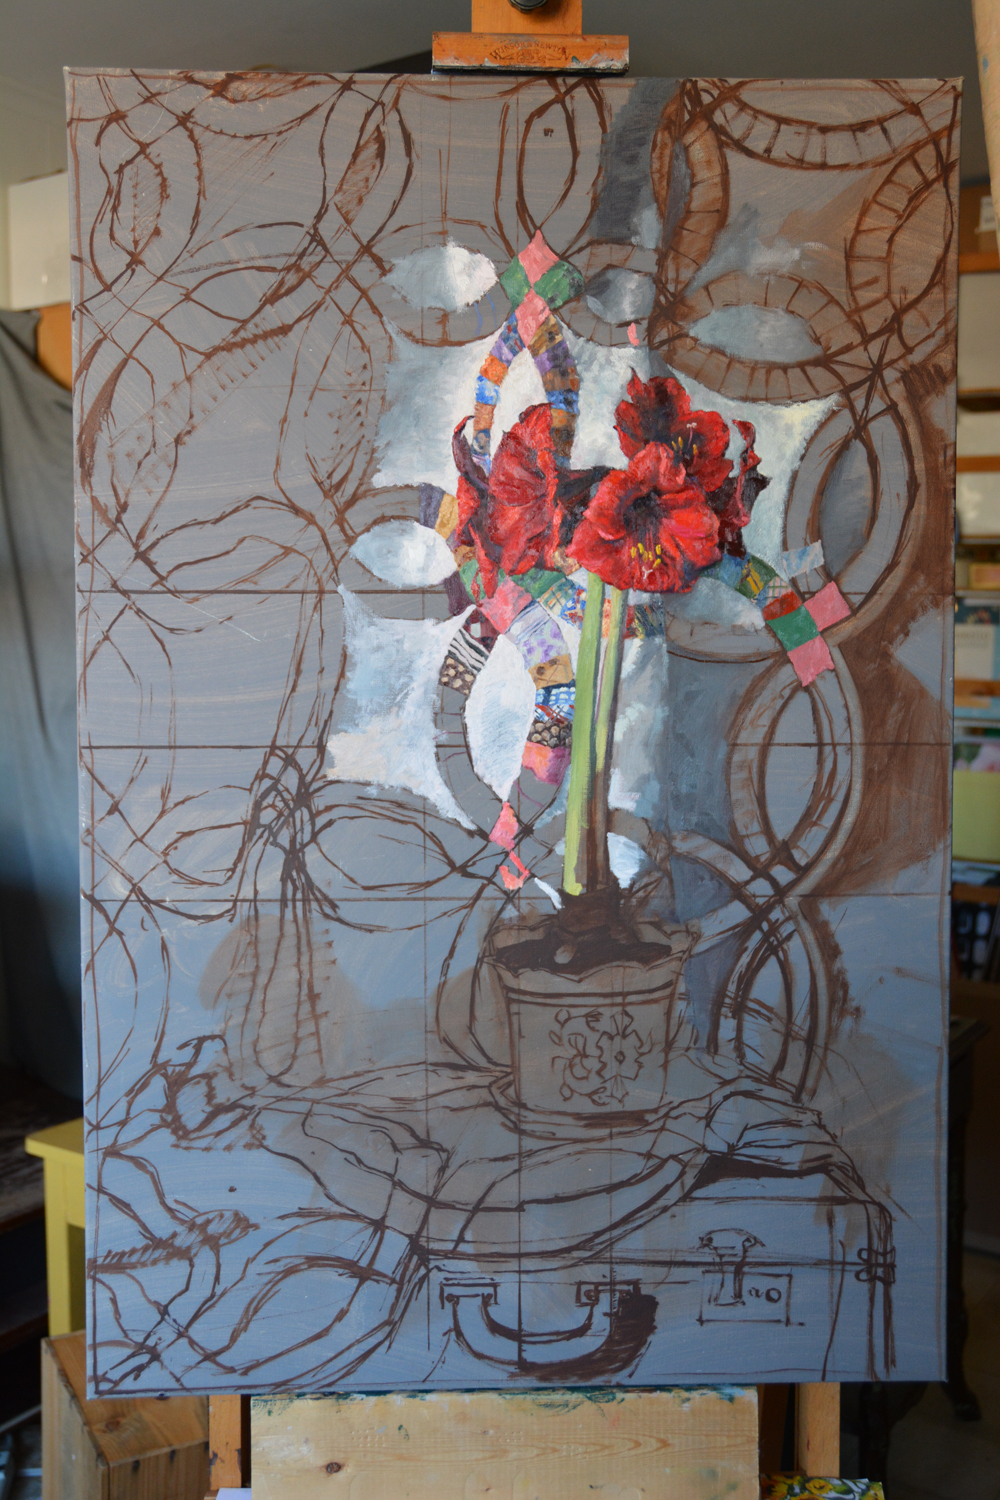
Because of this desire to paint from life and knowing a flower only has so long before it begins to fade, I have to plan the sequencing of how to paint every given floral still-life composition. Typically I begin every painting with a drawing painted in with burnt umber, then I begin to immediately paint the areas with the most limited lifetime, in this painting it was the amaryllis flower.

{first day: end of burnt umber block-in}
By beginning with a burnt umber drawing, I make sure that I can get the scene onto the canvas as I want, establishing an accuracy in proportion and scale. I always try to get the drawing as correct as possible, even knowing that once I begin to paint the under-drawing is going to be obliterated. I view this phase as a very important step because I feel like it helps me engage a level of muscle memory and mental connectedness I want to have with my compositions.
After the under-drawing is finished, I will take a small break (15-30 minutes) to get away from the painting, so when I return I will have fresh eyes and will be able to identify any errors in the original burnt umber drawing. If all is well, I dive into painting the most important and ephemeral subjects.

{first day: at the end of the painting session}
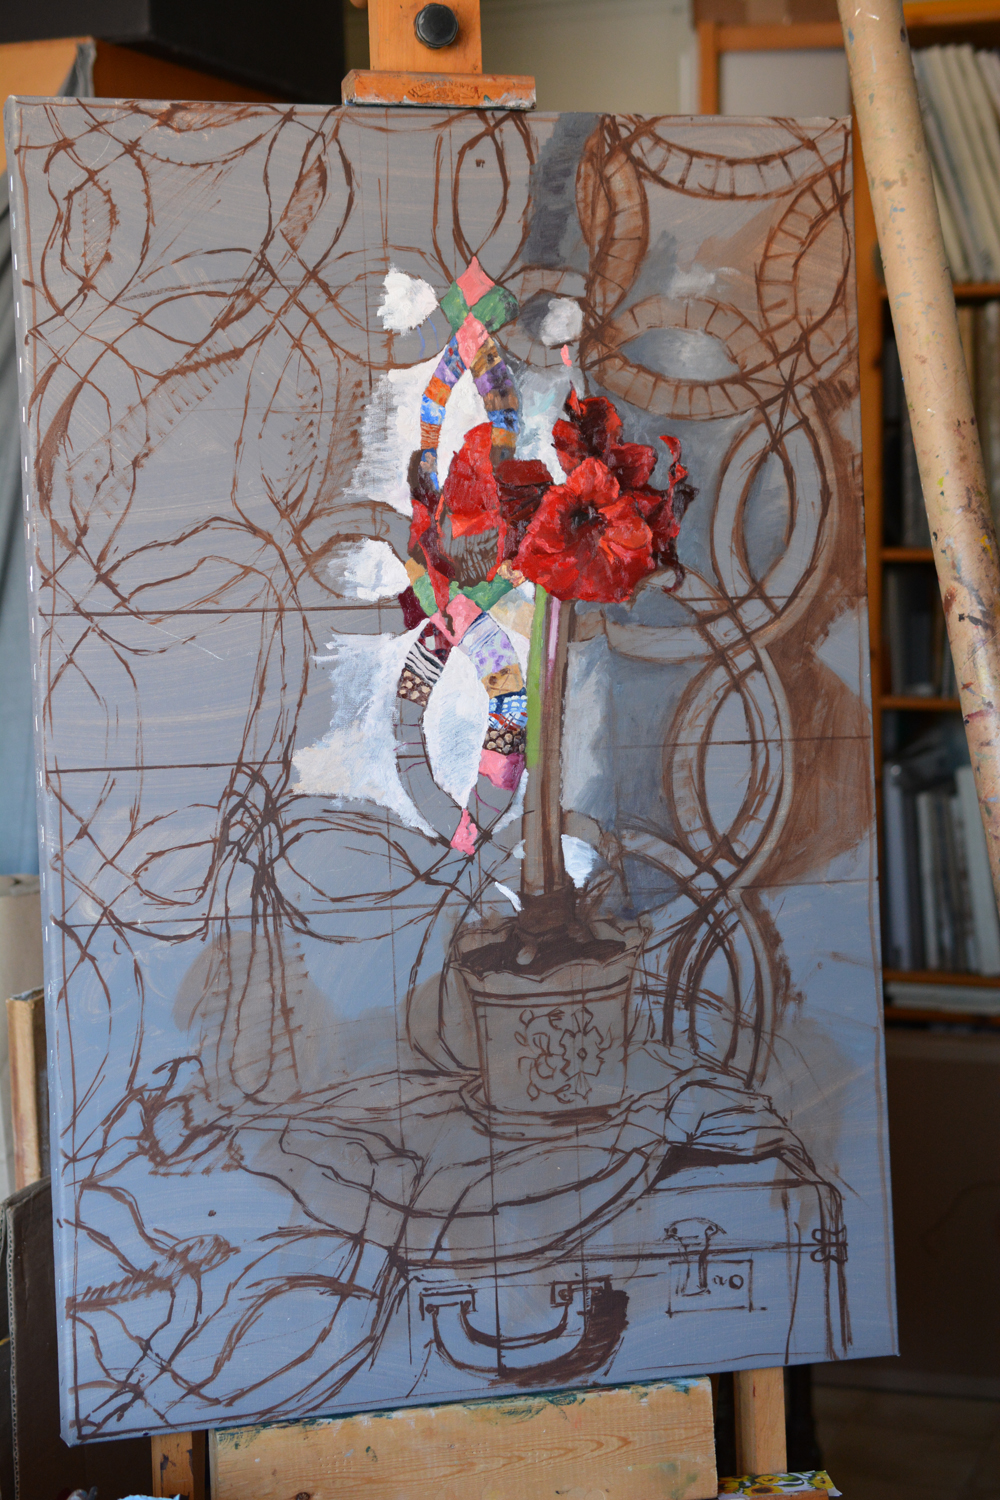
I began painting the amaryllis flower right away. Blocking in color masses, keeping the shapes large and descriptive of the total structure of each flower. When I paint flowers I am also trying to gage how long each flower will keep fresh and bright. I knew from watching how the flower opened that the flowers on my right were the ones that would fade the quickest. So they were the first ones tackled. Leaving the two flowers on the left to be partially laid in.
{first day: end of painting session}
Because when painting you make decisions based on the adjacent areas, I also began laying in the values for the neighboring background areas.
{second day: a few hours into the painting session}
Upon returning to this painting the next morning I realized I needed to spend some more time laying in the adjacent background areas. So I began to tackle more of the double wedding-ring pattern and the white areas.
{second day: near the end of the day}
After the adjacent areas were laid in, I went back into the amaryllis flower and began refining. I also took out the back of one of the flowers that had wilted overnight. Sometimes I will keep a wilted flower in my painting even after it has ceased to exist, however with this painting I realized the void left by that one flower, now wilted, made for a more dynamic shape of the overall flowerhead.

{second day: end of painting session}
{third day: a few hours into the painting session}
On the morning of third painting session, I realized that this would be my last day to work with the amaryllis flower before it totally wilted. So I worked almost exclusively on it.

{third day: end of painting session, detail of the flowers}
As the end of the day drew near, I had just about finished with painting the amaryllis, so I began to focus on painting the quilt. I still stayed close to the areas of the amaryllis because I knew that I would need to use this area to key to as I worked on the quilt when the flower would not be there to help me judge for correct color and value.
For me, painting is the experience of slowing down and absorbing what I see, and by painting objects that have a fleeting life, such as a flower, I feel like I am making their beauty more permanent, something to be admired for a long time to come.
Thank you for stopping by and I will be back with another post that describes the next phase of this painting.